It’s a little known fact that the routers in Japanese ISPs are incredibly full featured when compared to the gateways you get abroad. One feature that is standard in most of them is VPN. In this post I’ll show you how I set-up my home network that allows me to access my GPU desktop from anywhere.
The first step is to look at the bottom of your router to find the default username and password. Then log in to the router which is typically the .1 address in your subnet. In my home it’s 192.168.9.1
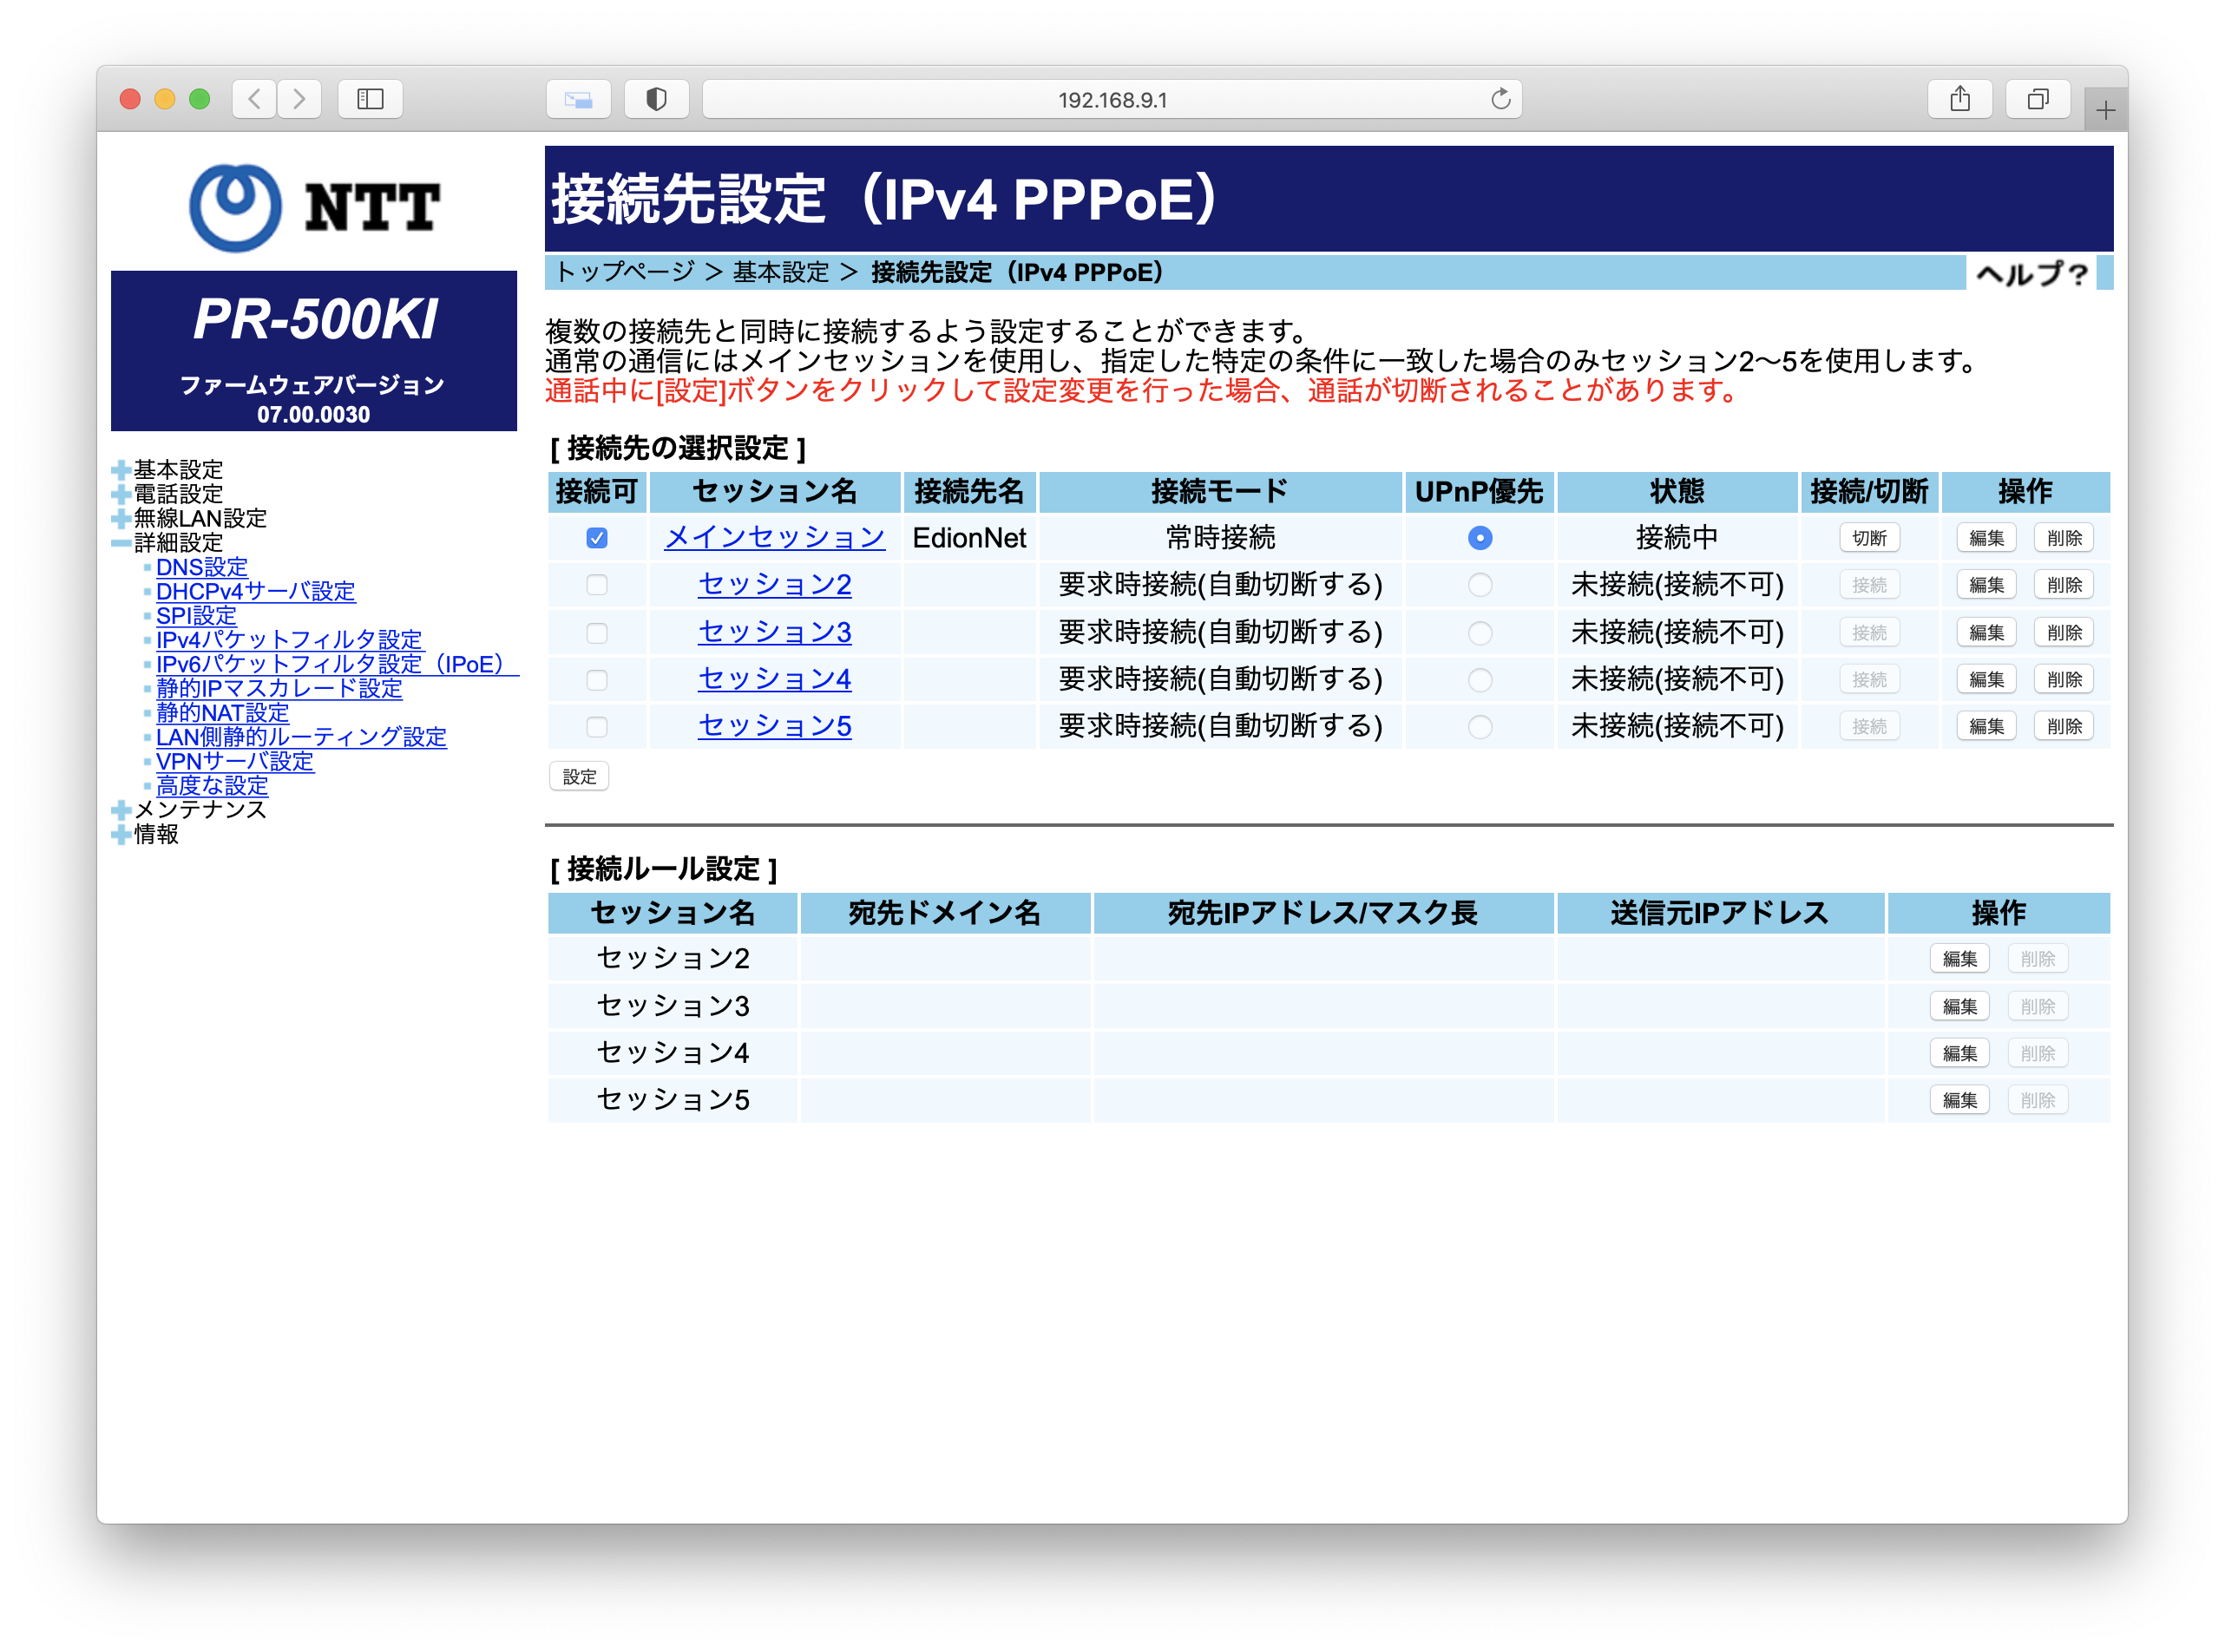
Expand the 詳細設定 (Advanced Options) menu on the left to show the VPN server settings link.
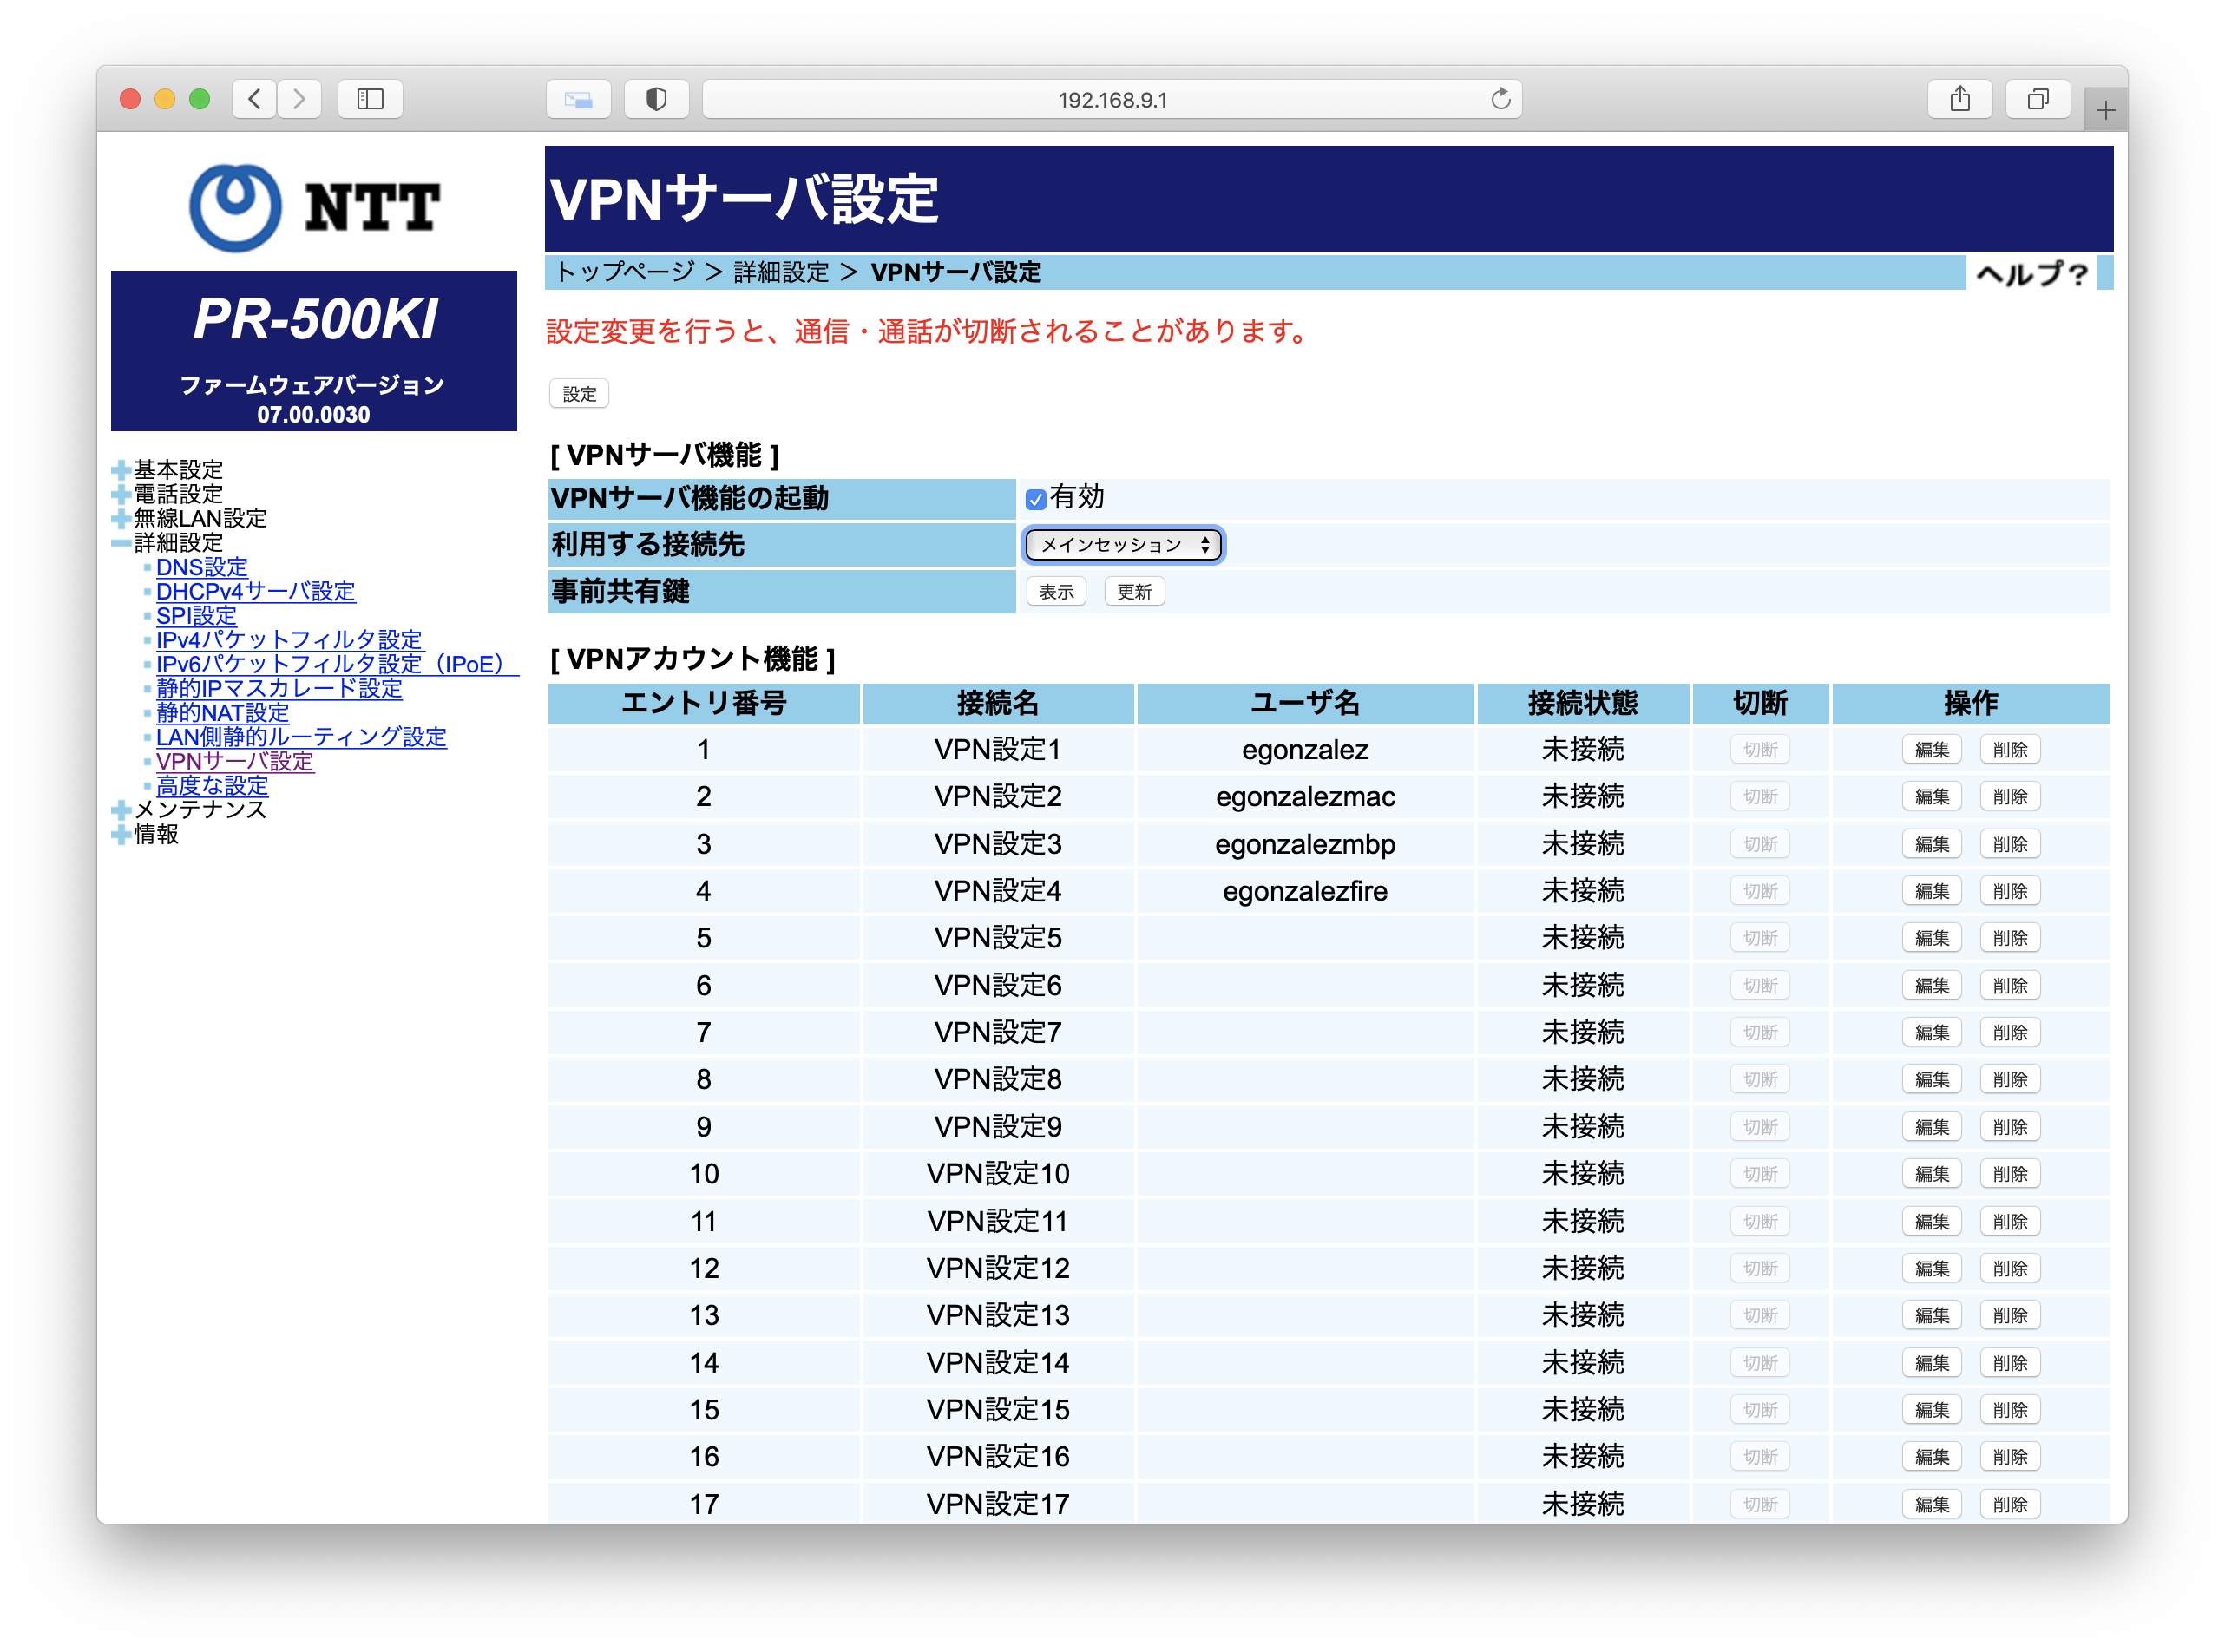
Check the 有効 checkbox to enable your VPN and take a note of the pre-shared key by clicking the 表示 button. Next make a VPN account by clicking one of the edit (編集) account slots and giving it a username and a (very strong) password.
To connect to the VPN on Mac open up the Network settings in the Setting app and click the add button to create a new network. Select VPN and choose the L2TP over IPSec type and give it a name.
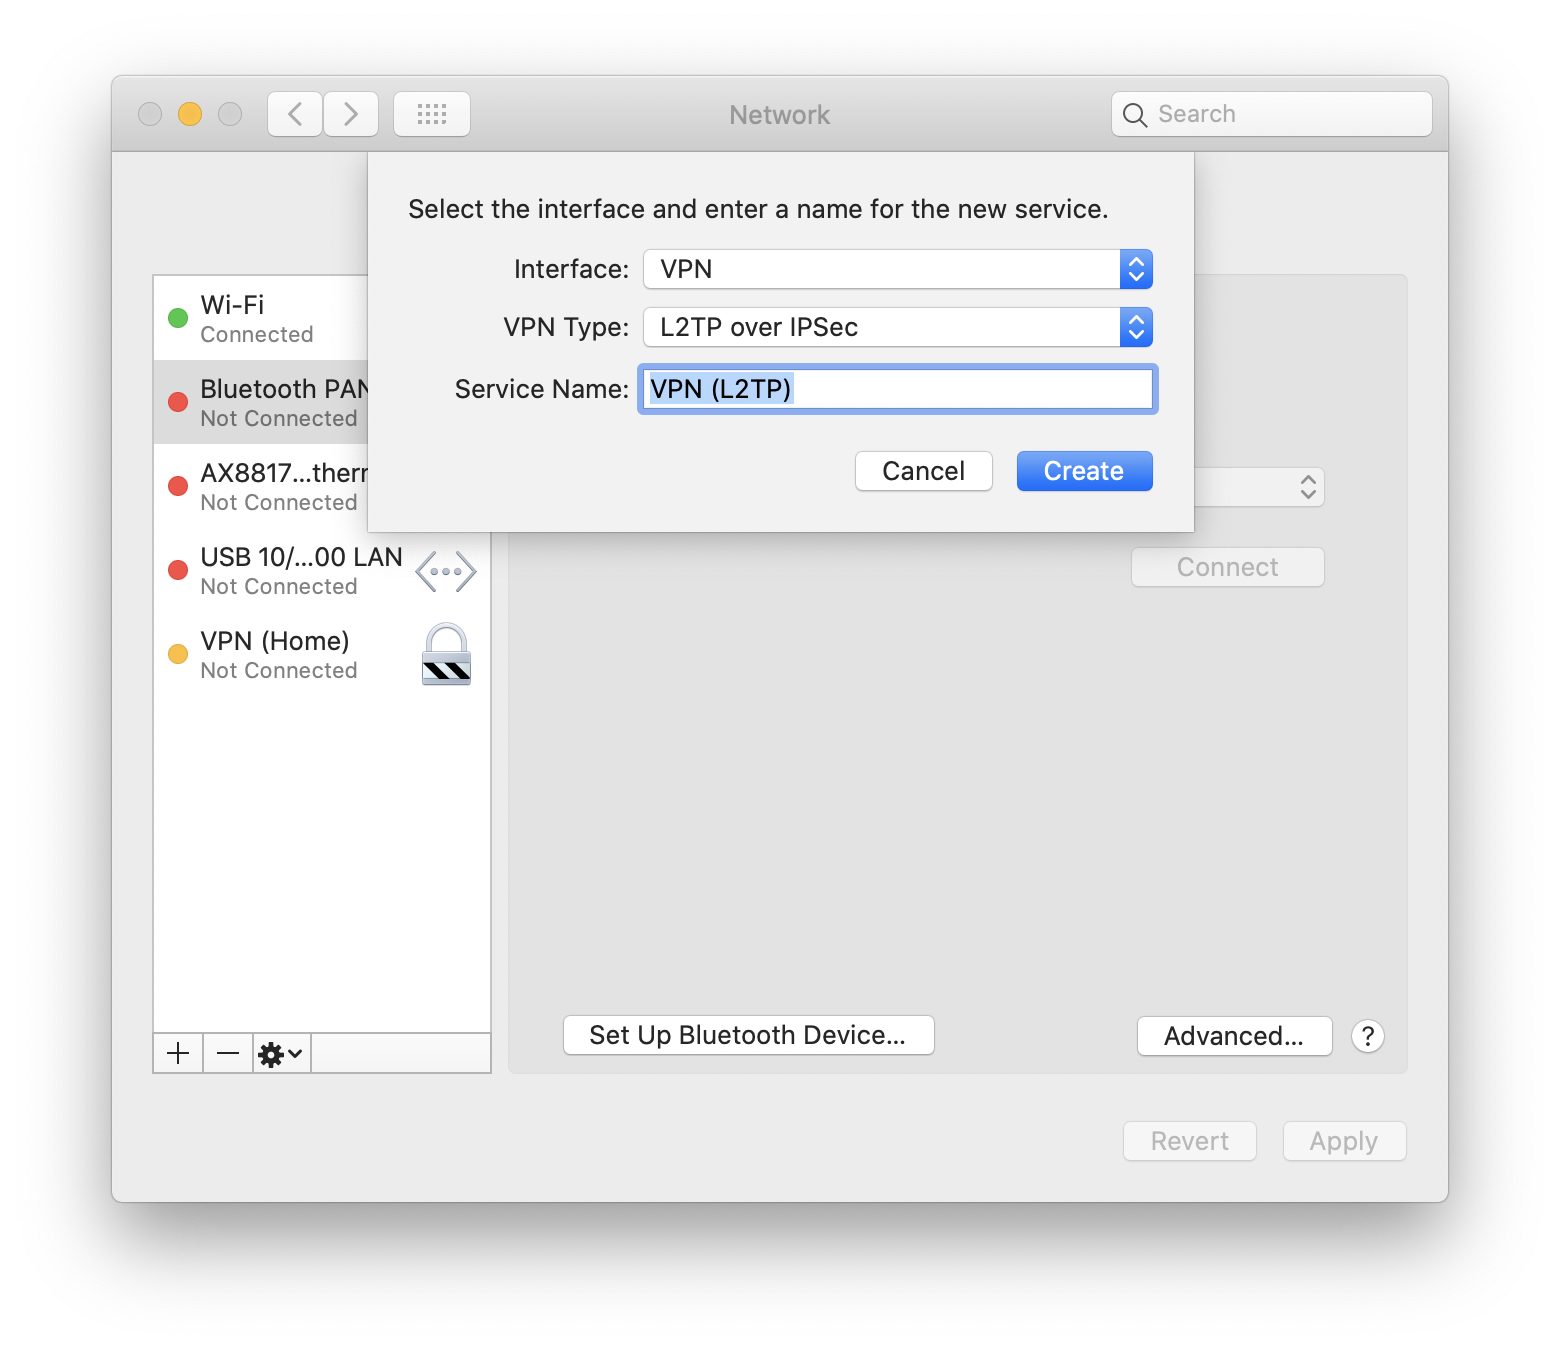
The Server Address is your public IP address which you can get by Googling for “Whats my IP address”
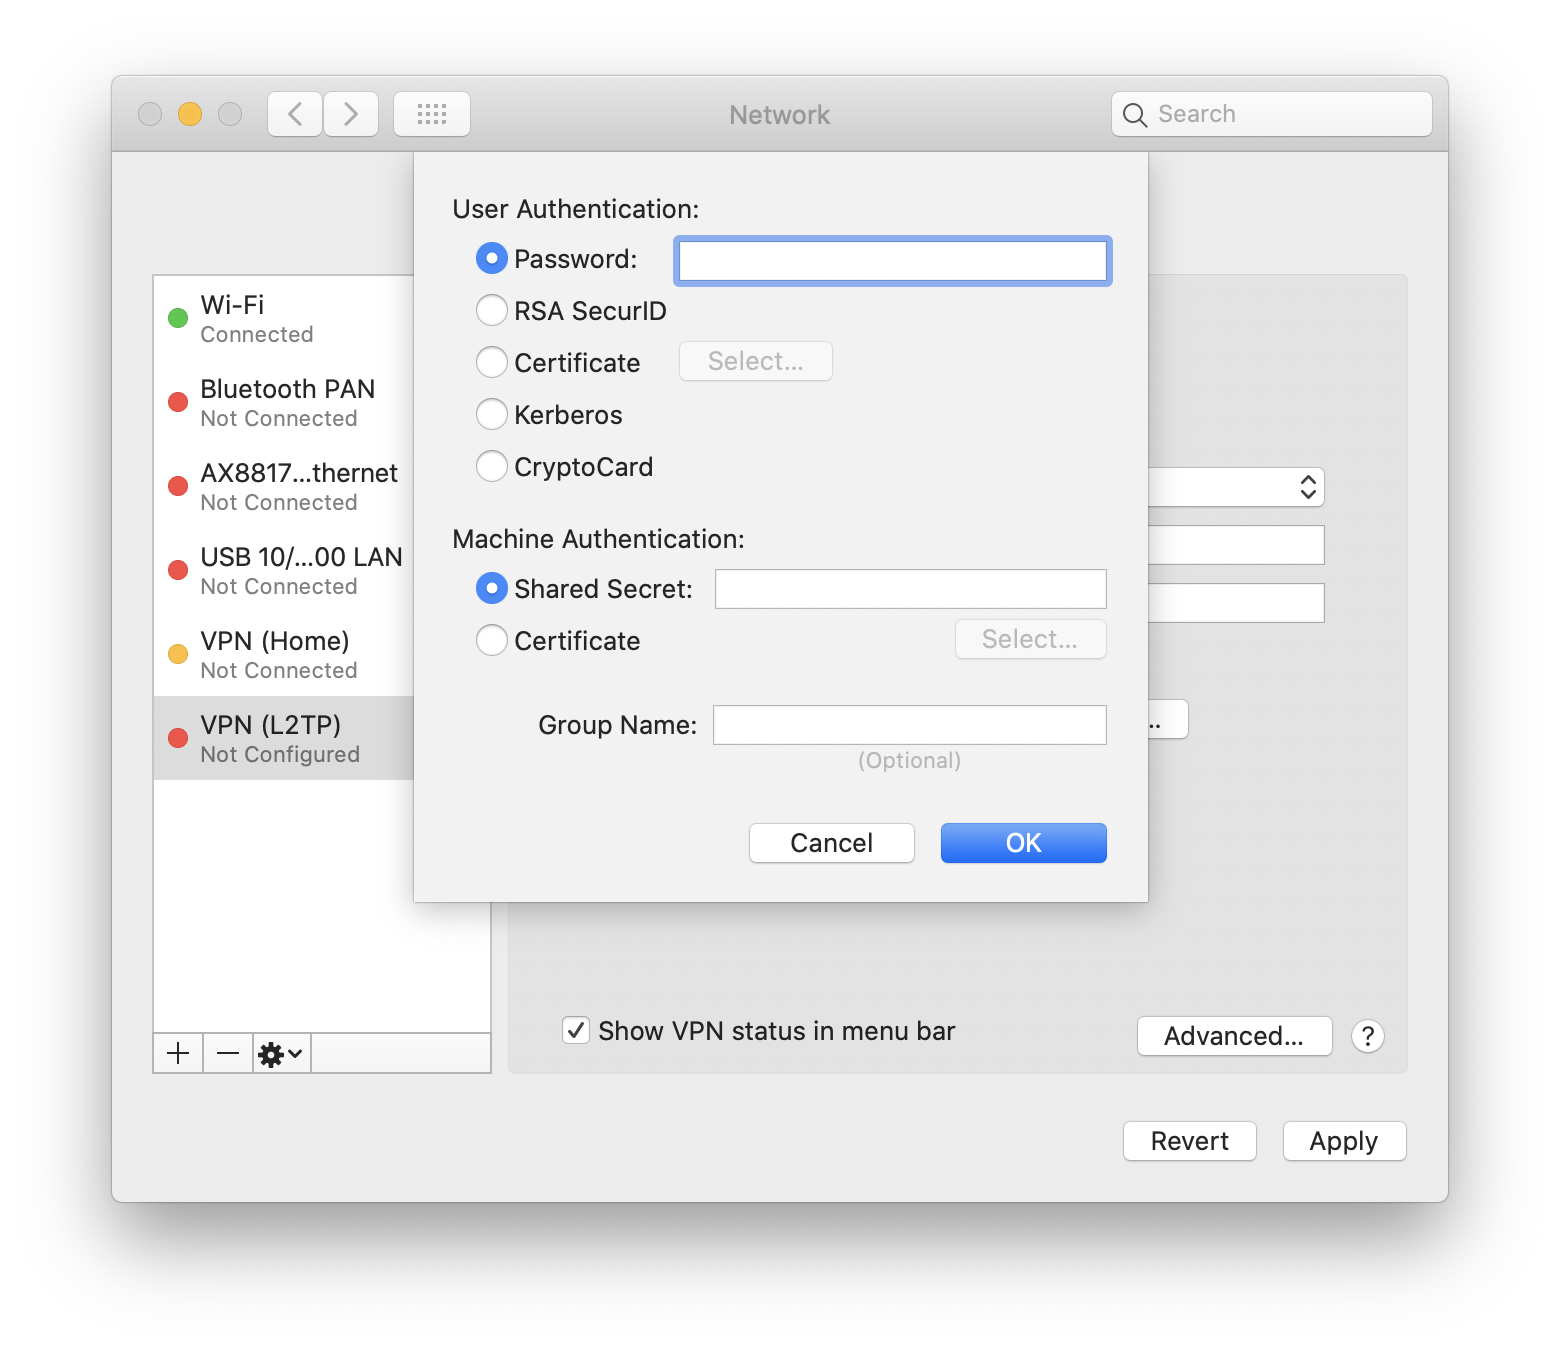
Click the Authentication Settings to enter your password and Shared Secret, click OK then Apply and you’ve finished the set-up. To test it you have to go outside your LAN but if everything is correct it’s as simple as clicking Connect.
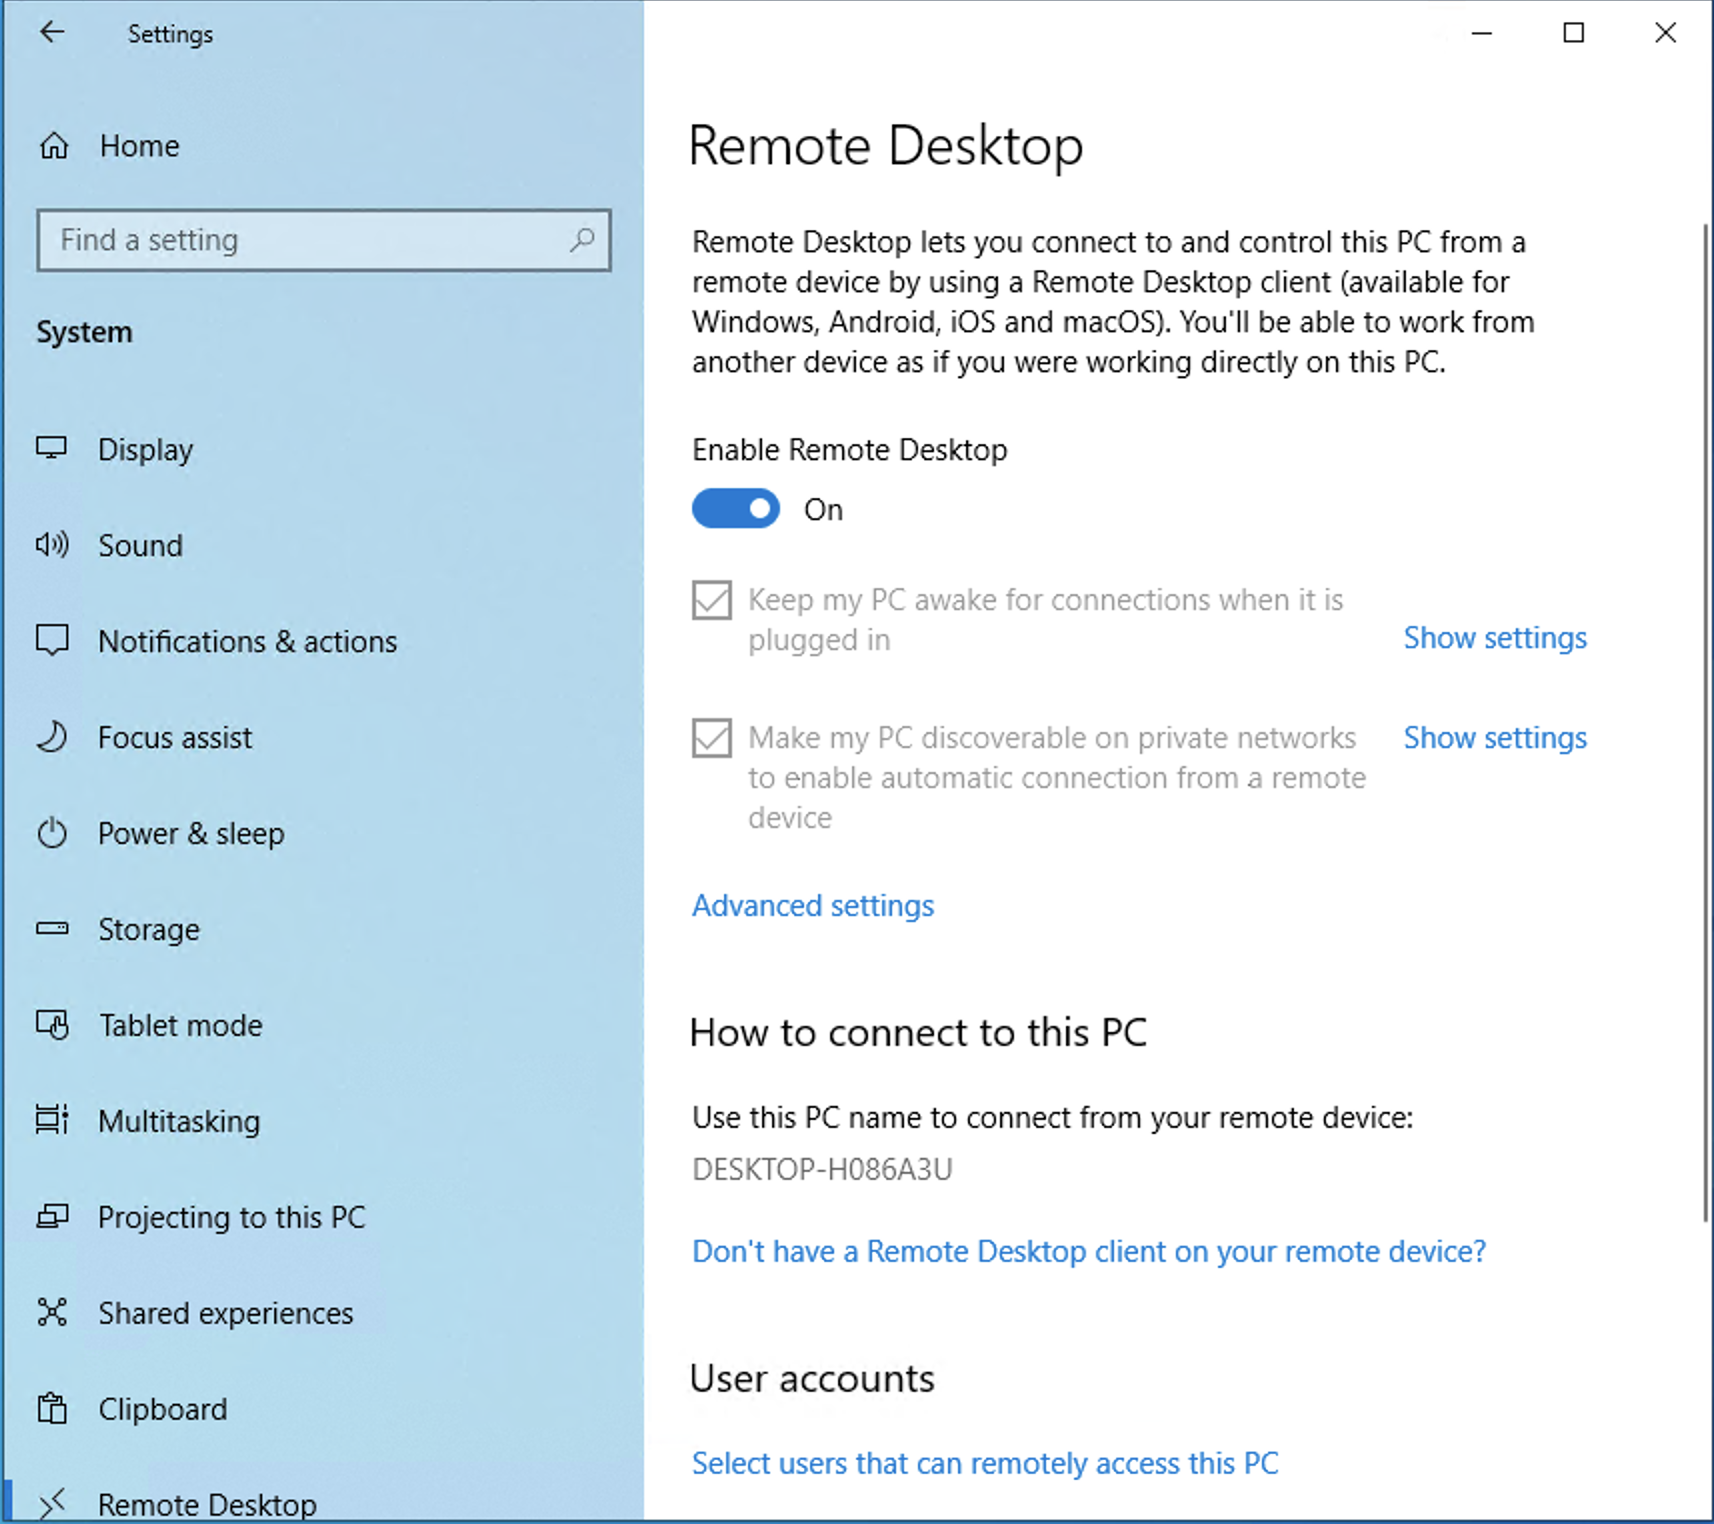
Next would be to connect to your GPU machine. If you have a Linux machine you should be able to simply SSH into it using its local IP address. I use Windows for my desktop machine so I use Remote Desktop. You only have to enable it in the Remote Desktop Settings under System in the Settings Window like so:
If you use Jupiter (which I don’t) you can start it up and log into it via your browser as long as you’ve set the listen address to 0.0.0.0 so that it accepts remote connections.
Leave a Reply